Proper 260mm disc diffuser installation is essential for achieving uniform aeration, stable oxygen transfer and reliable long-term operation. Even a high-quality fine-bubble diffuser may experience air leakage, uneven bubble distribution or excessive pressure loss if the piping, layout and commissioning are not properly coordinated.
When selecting a membrane disc diffuser, many buyers focus primarily on the unit price, membrane material and airflow range. These specifications are important, but they do not tell the whole story. Installation quality can directly affect the performance of the complete wastewater aeration system.
This guide explains the most common installation problems, the hidden costs of incorrect installation and the technical support a reliable diffuser supplier should provide.
Why Proper Disc Diffuser Installation Matters
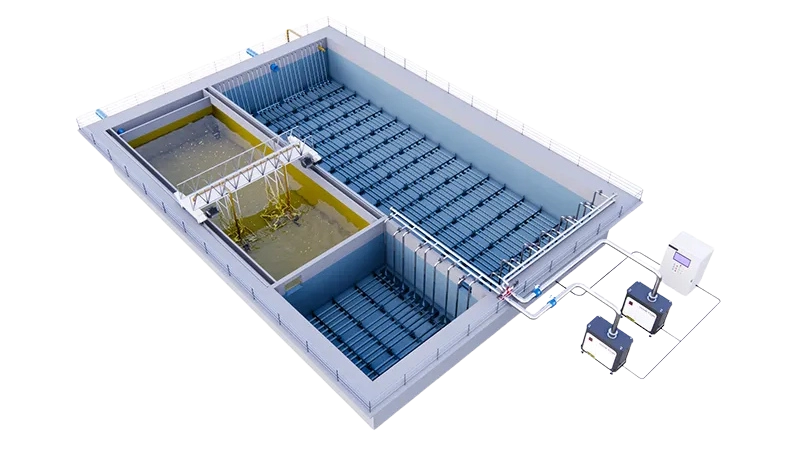
A membrane disc diffuser is part of a complete aeration system. Its performance depends on more than the diffuser itself.
The following components must work together:
– Aeration blowers
– Main air headers
– Lateral air pipes
– Control valves
– Pipe supports
– Diffuser connections
– Membranes
– Tank geometry
– Operating water depth
If one part of the system is incorrectly designed or installed, airflow may not be distributed evenly across the aeration tank.
For example, a diffuser installed on an uneven lateral pipe may operate under a different water pressure from the diffusers in another part of the tank. Air naturally follows the path of least resistance, so some areas may receive too much air while others receive too little.
The result may include unstable dissolved oxygen, poor biological-treatment performance and unnecessary blower energy consumption.
Common 260mm Disc Diffuser Installation Problems
Several installation mistakes appear repeatedly in new wastewater treatment projects and aeration-system upgrades.
Incorrect connection or sealing
The connection between the diffuser and the air pipe must be properly sealed. If the thread size is incorrect or unsuitable sealing material is used, air may escape through the connection rather than passing through the membrane.
Large bubbles around the diffuser base are usually a sign of connection leakage.
Excessive tightening
Overtightening does not necessarily improve the seal. It may damage the diffuser base, adapter or pipe thread.
The diffuser should be tightened according to the manufacturer’s instructions. Installers should avoid using excessive force, especially when working with plastic components.
Unlevel lateral pipes
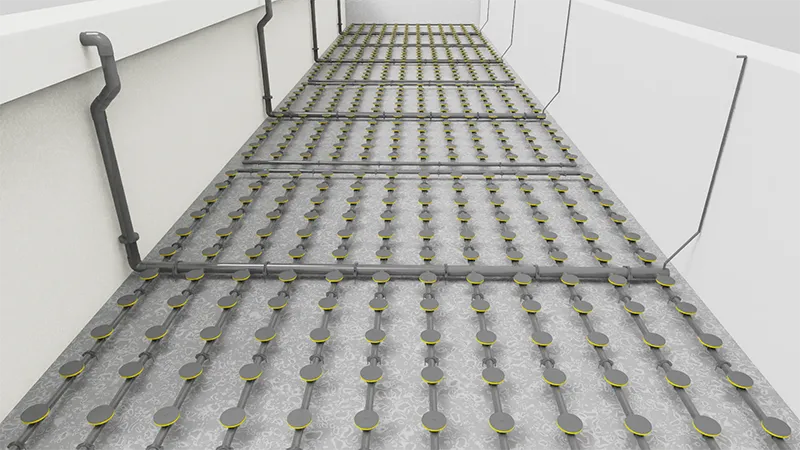
The lateral pipes should be installed securely and kept as level as reasonably possible. Significant differences in elevation can create unequal water pressure and uneven air distribution.
Pipe supports must also be strong enough to prevent movement when the aeration system starts and stops.
Dirty air pipes
Welding slag, plastic fragments, dust and other debris may remain inside the pipework after fabrication or installation.
If the system is not cleaned before the diffusers are installed, this material may enter the diffuser connection or block the membrane openings.
Excessive airflow
Every diffuser has a recommended operating airflow range. Operating continuously above that range may increase membrane stress, produce larger bubbles and reduce oxygen-transfer efficiency.
Higher airflow does not always mean better aeration. The correct airflow should be determined by the biological oxygen demand, tank depth and diffuser layout.
Starting the blower at full capacity
During initial commissioning, the airflow should be increased gradually. Starting immediately at maximum output may place unnecessary stress on the membranes and make it harder to identify leaks or distribution problems.
The Hidden Cost of Incorrect Installation
The purchase price of the diffuser is only one part of the total aeration-system cost.
Incorrect installation may create additional expenses through:
– Damaged membranes or diffuser bases
– Reinstallation and additional labour
– Construction delays
– Air loss through leaking connections
– Higher blower electricity consumption
– Unstable dissolved oxygen
– Reduced biological-treatment performance
– More frequent maintenance
– Premature diffuser replacement
Correcting a problem becomes more difficult after the aeration tank has entered service. The plant may need to stop the biological process, drain the tank and arrange confined-space work before the diffusers can be inspected.
For this reason, technical support during installation and commissioning can be more valuable than a small difference in the initial product price.
What Installation Support Should Include
Professional installation support should involve more than sending a generic manual.
A reliable supplier should understand the project conditions and provide recommendations that match the actual diffuser model, piping arrangement and operating requirements.
Project-data review
Before confirming the diffuser quantity and layout, the supplier should review:
– Design and peak wastewater flow
– Biological treatment process
– Influent characteristics
– Required effluent quality
– Aeration tank dimensions
– Operating water depth
– Design oxygen demand
– Required airflow
– Blower capacity and pressure
– Air-pipe dimensions and material
– Diffuser connection type
– Wastewater temperature
– Oil, grease, chemicals or solvents in the wastewater
Without this information, it is difficult to determine whether the selected diffuser is suitable for the project.
Model-specific installation instructions
Installation documents should correspond to the actual product being delivered.
They should include:
– Diffuser dimensions
– Thread or connector size
– Recommended sealing method
– Installation orientation
– Tightening guidance
– Pipe-support recommendations
– Leakage-test procedure
– Start-up instructions
– Recommended operating airflow
A generic installation video may be useful as a reference, but it should not replace model-specific technical documentation.
Retrofit compatibility review
When replacing old diffusers, the new product must be checked against the existing piping system.
The supplier should confirm:
– Existing connection size
– Male or female thread configuration
– Adapter requirements
– Available installation clearance
– Existing airflow per diffuser
– Current system pressure
– Blower operating range
– Condition of the air pipes
A direct one-for-one replacement may not provide the best result if the existing system was poorly designed or if operating conditions have changed.
260mm Disc Diffuser Installation Procedure
The following process provides a practical reference for 260mm disc diffuser installation. The exact requirements should always follow the product manual and approved project drawings.
Step 1: Inspect the delivered products
Before installation, check the diffusers, membranes, connectors and accessories for transportation damage.
Confirm that the diffuser model and connection type match the purchase order and project drawings.
Step 2: Check the aeration piping
Inspect the main headers and lateral pipes. Confirm that the pipework is properly supported, aligned and fixed.
Pay particular attention to the position and orientation of every diffuser connection.
Step 3: Clean the pipes
Remove welding slag, plastic fragments, dust and other contaminants from the piping system.
Where possible, flush or blow out the air pipes before installing the diffusers.
Step 4: Confirm connection compatibility
Check the diffuser thread, adapter and pipe connection before tightening.
Do not force incompatible components together. If an adapter is required, confirm its material and pressure suitability before installation.
Step 5: Apply the correct sealing method
Use the sealing method recommended for the diffuser connection.
Avoid applying excessive sealing tape or sealant. Material entering the air passage may restrict airflow or contaminate the diffuser.
Step 6: Install the diffuser carefully
Position the diffuser correctly and tighten it using controlled force.
Avoid holding, twisting or pulling the membrane during installation. The membrane surface should remain clean and undamaged.
Step 7: Inspect the completed aeration grid
After all diffusers have been installed, visually inspect the complete grid.
Check that:
– Diffusers are positioned correctly
– Connections are secure
– Lateral pipes are level
– Pipe supports are properly fixed
– No tools or construction debris remain in the tank
Step 8: Conduct a clean-water leakage test
Fill the tank with clean water to the specified test depth and introduce air at low pressure.
Inspect the diffuser bases and pipe connections. Large bubbles around a connection may indicate leakage.
Also compare the bubble distribution between different areas of the tank.
Step 9: Increase airflow gradually
After the leakage test, increase the airflow in stages.
Observe the system pressure, bubble pattern and blower operating condition. Confirm that no zone receives excessive or insufficient airflow.
Installation Requirements for Different Projects
Different wastewater projects require different levels of engineering and installation support.
Municipal wastewater treatment plants
Municipal plants often contain a large number of diffusers. Airflow uniformity, energy efficiency and long-term maintenance are therefore important.
The aeration grid should be evaluated as a complete system rather than as a collection of individual diffusers.
Industrial wastewater treatment plants
Industrial wastewater may contain oil, grease, solvents, salts, acids or alkaline compounds.
These substances may affect membrane performance. The membrane material should therefore be selected according to the actual wastewater characteristics.
Aeration-system upgrades
Retrofit projects require careful evaluation of the existing pipes, blowers and operating conditions.
Replacing old diffusers without reviewing the complete system may reproduce the original problem.
Packaged wastewater treatment systems
Compact systems may have limited installation space and smaller air pipes. Standardised connections, clear documentation and accessible maintenance points are especially important.
Questions to Ask a Disc Diffuser Supplier
Before selecting a supplier, consider asking the following questions:
1. Can you calculate the required airflow and diffuser quantity?
2. Can you provide a preliminary aeration-grid layout?
3. Can you check whether the blower pressure is sufficient?
4. Can you confirm compatibility with the existing air pipes?
5. Do you provide model-specific installation instructions?
6. Is remote installation support available?
7. Can you assist with leakage testing and initial commissioning?
8. Can you analyse uneven aeration or abnormal system pressure?
9. Can you provide a complete aeration proposal rather than only individual products?
A supplier that only provides a quotation may not be able to support the complete aeration system.
HINKTON Aeration Engineering and Installation Support
HINKTON supplies fine-bubble disc diffusers, tube diffusers, aeration hoses and complete aeration systems for municipal and industrial wastewater treatment projects.
Our support can include:
– Diffuser selection
– Oxygen-demand calculations
– Airflow calculations
– Preliminary diffuser-quantity calculations
– Aeration-grid layout recommendations
– Pressure-loss evaluation
– Blower and diffuser matching
– Pipe-connection guidance
– Retrofit compatibility review
– Installation documentation
– Remote installation guidance
– Leakage-test support
– Initial commissioning assistance
– Aeration-system troubleshooting
For complex projects, changing the diffusers alone may not solve the operating problem. HINKTON can review the interaction between the blowers, air headers, lateral pipes, valves and diffusers to identify the likely cause of excessive pressure or uneven aeration.
Request a 260mm Disc Diffuser Installation Assessment
If you are planning a new wastewater treatment plant, upgrading an existing aeration system or replacing old diffusers, HINKTON can assist with preliminary product selection and system evaluation.
For a 260mm disc diffuser installation assessment, please provide:
– Wastewater flow
– Biological process
– Influent and effluent data
– Aeration tank dimensions
– Operating water depth
– Existing diffuser information
– Blower airflow and pressure
– Air-pipe dimensions
– Project drawings or site photographs
Based on the available information, HINKTON can recommend a suitable diffuser configuration and provide practical guidance for installation, testing and commissioning.
Correct diffuser selection matters—but correct installation is what allows the aeration system to deliver stable performance over the long term.
260mm Disc Diffuser Installation: 9 Essential Steps
Table of Contents
hinktongroupadmin
Related Products

Related News
Proper 260mm disc diffuser installation is essential for achieving uniform aeration, stable oxygen transfer and reliable long-term operation. Even a […]
The HINKTON DISK-X fine bubble disc diffuser is engineered for efficient oxygen transfer in municipal and industrial wastewater treatment systems. […]
A fine bubble diffuser for wastewater treatment improves oxygen transfer, supports biological treatment and helps reduce unnecessary aeration energy. This […]
Selecting the right blower is one of the most important decisions in the design or upgrade of a wastewater aeration […]
Fluoride removal from industrial wastewater is a common challenge in semiconductor, photovoltaic, electroplating, mining and metal-processing industries. High fluoride concentrations […]
An industrial wastewater treatment and water-reuse project in a zero-carbon industrial park required a more stable and energy-efficient aeration strategy. […]
Custom aeration diffuser solutions are designed for wastewater treatment projects where standard aeration products cannot fully meet specific technical, installation […]
Replacing tube diffusers without draining the tank can be challenging when a wastewater treatment plant must remain in continuous operation, […]